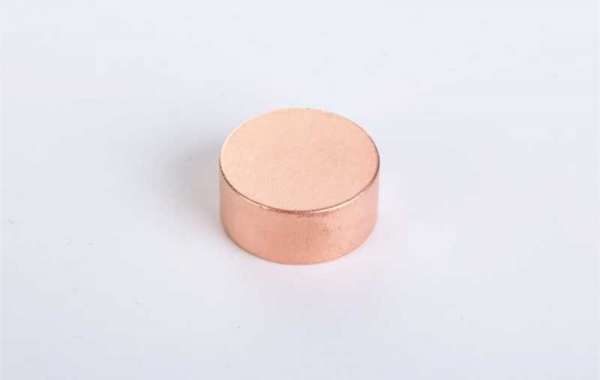
Manufacturing Neodymium Disc Magnets requires an extremely controlled and technical process. Below is an outline of each step in the process without all of the technical details. If all of the technical details were added this short Step by Step Overview would turn into a novel. So, enjoy the short summary and keep in mind that the process is extremely technical, takes an enormous amount of capital, and not for the faint of heart.
Step 1: Raw Materials: The Recipe Must Be Followed Carefully
disc neodymium magnets are produced in grades ranging from Neodymium 28 to Neodymium 55. Starting with the correct raw material mix is critical to get the desired results of Br, Hci, Hcb and BHmax. This is a little like baking bread, but instead of flour, salt, yeast, etc., you are measuring out the exact combination of Nd, Fe, B, Dy and a few other elements of lesser volume. And using the bread analogy a bit further, make sure you add enough of each ingredient to make about 500 loaves of bread.
Step 2: Melting the Ingredients: It’s Got to Be A VERY Hot Pot
After the proper combination of materials is weighed and confirmed, the melting process awaits. All of the materials are processed so all materials are melted together to turn the solid raw materials into a molten liquid. Once turned into a liquid, all of the materials have been combined to form the liquid form of the magnetic material.
Step 3: Strip Casting: They Look Like Cereal Flakes
Once the melting process is complete and the materials are completely combined, the molten liquid will be cooled quickly by pouring it onto a cold rotating wheel. This process is known as “strip casting.” This rapidly cools the molten liquid and turns it into “flakes” of material (without the frosting) that resemble a famous breakfast cereal. Each flake is now a combination of the raw materials selected in Step 1.
Step 4: Hydrogen Decrepitation (HD): Anything Using Hydrogen Has to Include Caution
Here’s where it starts to get a bit more technical. Hydrogen Decrepitation (HD) is a method that prepares strip cast materials for Jet Milling. This process breaks apart the flakes to make them more like powder, ranging in size, approximately 250-300 microns. During Hydrogen Decrepitation the strip cast “flakes” of neodymium material are placed in a chamber and subjected to an infusion of hydrogen that breaks the flake apart without damaging the materials.
Step 5: Jet Milling: A Tornadic Experience
Making a disc neodymium magnet requires that the powder size is very small, usually around 5 microns. In the Jet Milling process the “flakes” from the HD process are placed in a jet mill system where they are spun in a tornadic process. As the “flakes” collide they gently break apart and become smaller without damage to the material. Once the particle size is around 5 microns they are able to pass through a screen and into a vessel that looks like a time capsule that is void of oxygen so that the powder does not oxidize. These 5-micron particles are now ready for the next step, Pressing. To try to paint a picture of these particles by using a baking analogy again, they would be equivalent to the “flour “if you were baking bread. NOTE: Since oxygen is the enemy of disc neodymium magnets, it is critical to keep this powder (“flour”) away from any form of oxygen. Exposure to oxygen will compromise the desired outcome and possibly render the lot of material unusable.
Step 6: Pressing Orienting the Material: Magnetic Field Required
Once Jet Milling is complete the result is a vessel full of “flour-like” powder that is ready to be pressed. This step is actually 2 processes in one: Pressing and Orientation of the material. Here is where there is a misconception about magnets. The common thinking is that the magnet will be pressed to the exact size and shape defined on a customer drawing. The reality is that pressing produces blocks or cylinders that are large enough to be machined into smaller sizes. So, for example, one of the pressed block sizes may be around 3” x 3” x 2.5”. This size can then be machined (as outlined in Step 8) to the correct size and shape as spec’d on the drawing. As the block or cylinder is being pressed a magnetic field is applied during pressing. The purpose of this magnetic field is to define the direction of orientation inside of the material. So, if a block is pressed with a size of 3” x 3” by 2.5”, and the magnetic field applied during pressing orients the particles inside of the block so it’s direction of orientation is through the 2.5” dimension, then once the pressing is completed this material is set and the only way the material can be magnetized is through the 2.5” dimension. While this block of material is now magnetic it is not actually magnetize d. That process will happen after Steps 7-10 are completed and the finished magnet arrives at Step 11. Before this pressed block is removed from the press, it is wrapped in a paper similar to wax paper and vacuum sealed to keep it from being exposed to oxygen. Protection from oxygen is critical in every phase of magnet production.
Step 7: Iso static Pressing: Let’s Pack It In!
There are actually 2 steps in the pressing process…..the first is listed in Step 6 above, the second is an iso static press to make the block of material more dense and compact. This process takes only a couple of minutes and requires placement of the wrapped blocks of material in an oil-based press. Once inside the iso static press, the pressure is built up to press the material together so the magnetic properties are the best possible.
Step 8: Sintering: Now it Gets Really Hot
After pressing, the material is unwrapped in a controlled environment and placed into a sintering oven to turn the block from pressed powder into a solid block of material. During this process the time, temperature and ramp cycle is programmed very precisely. Also, this part of the process guarantees that the internal structure of the material is set. Once the sintering cycle is complete, a sample piece from several blocks in the lot will be taken and tested to validate the pedigree of the material.
Step 9: Machining: Let’s Get the Shape and Size Needed
The starting point for any project is a drawing, and a magnet is no exception. With the sintering process complete and the pedigree of the material confirmed, it’s time to utilize the drawing to size and shape the part. This step involves cutting, grinding, wire EDM, and possibly other equipment to make the part per the drawing. The size, shape, and tolerance will determine the best machining processes needed, tooling required, and appropriate equipment to use. Once the entire machining process is determined and set, it is now time to make the part. A quick note about magnet machining …. magnet machining takes time. Magnets, in general, are brittle. This means that machining a magnet to the finished size from a block of material requires longer feed rates and cycles, which is not as quick as cutting steel, wood or plastic.
Step 10: Plating / Coating: What is the Correct Coating?
Most magnets are coated in Ni-Cu-Ni, however the selection of the appropriate coating should be determined by the application. Start by determining the environment, temperature, and any other factor that may affect the magnet, and an appropriate coating can be decided.
Step 11: Magnetizing: One Last Shot (of electrical current) and the We Have a Magnet!
The material has been selected and combined in strip casting. A block has been formed in pressing, and the magnet has been fabricated to the correct shape and size. The coating is applied, and the magnet is complete. Well almost complete. The last step is magnetizing. Magnetizing occurs when the material is placed into a magnetizing coil and a magnetizer shoots a large amount of voltage through the magnetizing coil. This energy is transferred into the N52 Rare Earth Magnets and the domains inside the magnet line up in the same direction, thus creating the north and south pole. Sounds easy, right? Well, this process involves a calculated amount of voltage, the right coil, the magnets being placed into the coil correctly, the pulse rate of the magnetizer set correctly, and keeping the magnetizing coil cooled at all times to make sure the magnet gets saturated. In summary, magnetizing a magnet is actually a science all by itself and without the proper equipment and experience your magnet would just remain a simple piece of metal instead of a magnet.


